Pages

Sunday, September 30, 2012

Banana Nut Granola Bars

I have really been enjoying bars lately because they are such an easy way to create a perfect healthy and portable snack.  Buying bars all the time can cost a lot of money and it can be hard to find a gluten free and vegan bar.  Plus, I like to make sure my bars are high in protein and low in unnatural sugars.  I came across this recipe on Pinterest.  With all the nuts, seeds, and fruit these bars are definitely heart healthy!


This recipe was adapted from here:

Ingredients:

  • 1/2 cup peanut butter
  • 2 mashed bananas
  • 1/2 cup whole almonds
  • 4 large Medjool dates, pitted
  • 1/4 cup dried cherries
  • 1/4 cup dried coconut flakes
  • 1/4 cup pumpkin seeds
  • 1 cup gf rolled oats
Directions:
  1. Preheat oven to 350F and line a loaf pan or 8x8" pan with parchment paper.  Set aside.
  2. In a small, combine peanut butter and mashed bananas and stir to incorporate.  (You may need to heat up the peanut butter before combining it in with the mashed bananas for easier strirring.)
  3. In a food processor, coarsely chop almonds, dates, and cherries.
  4. Add in the coconut flakes and pulse for a couple seconds, just to incorporate it into the mixture.
  5. Transfer mixture into a medium bowl and mix in the pumpkin seeds and oats.  Then, fold in the peanut butter and banana mixture.
  6. Press the batter into the prepared pan.  Bake for 20-30 minutes. (Mine had to bake for the longer time, I think because my bananas were on the big side.)
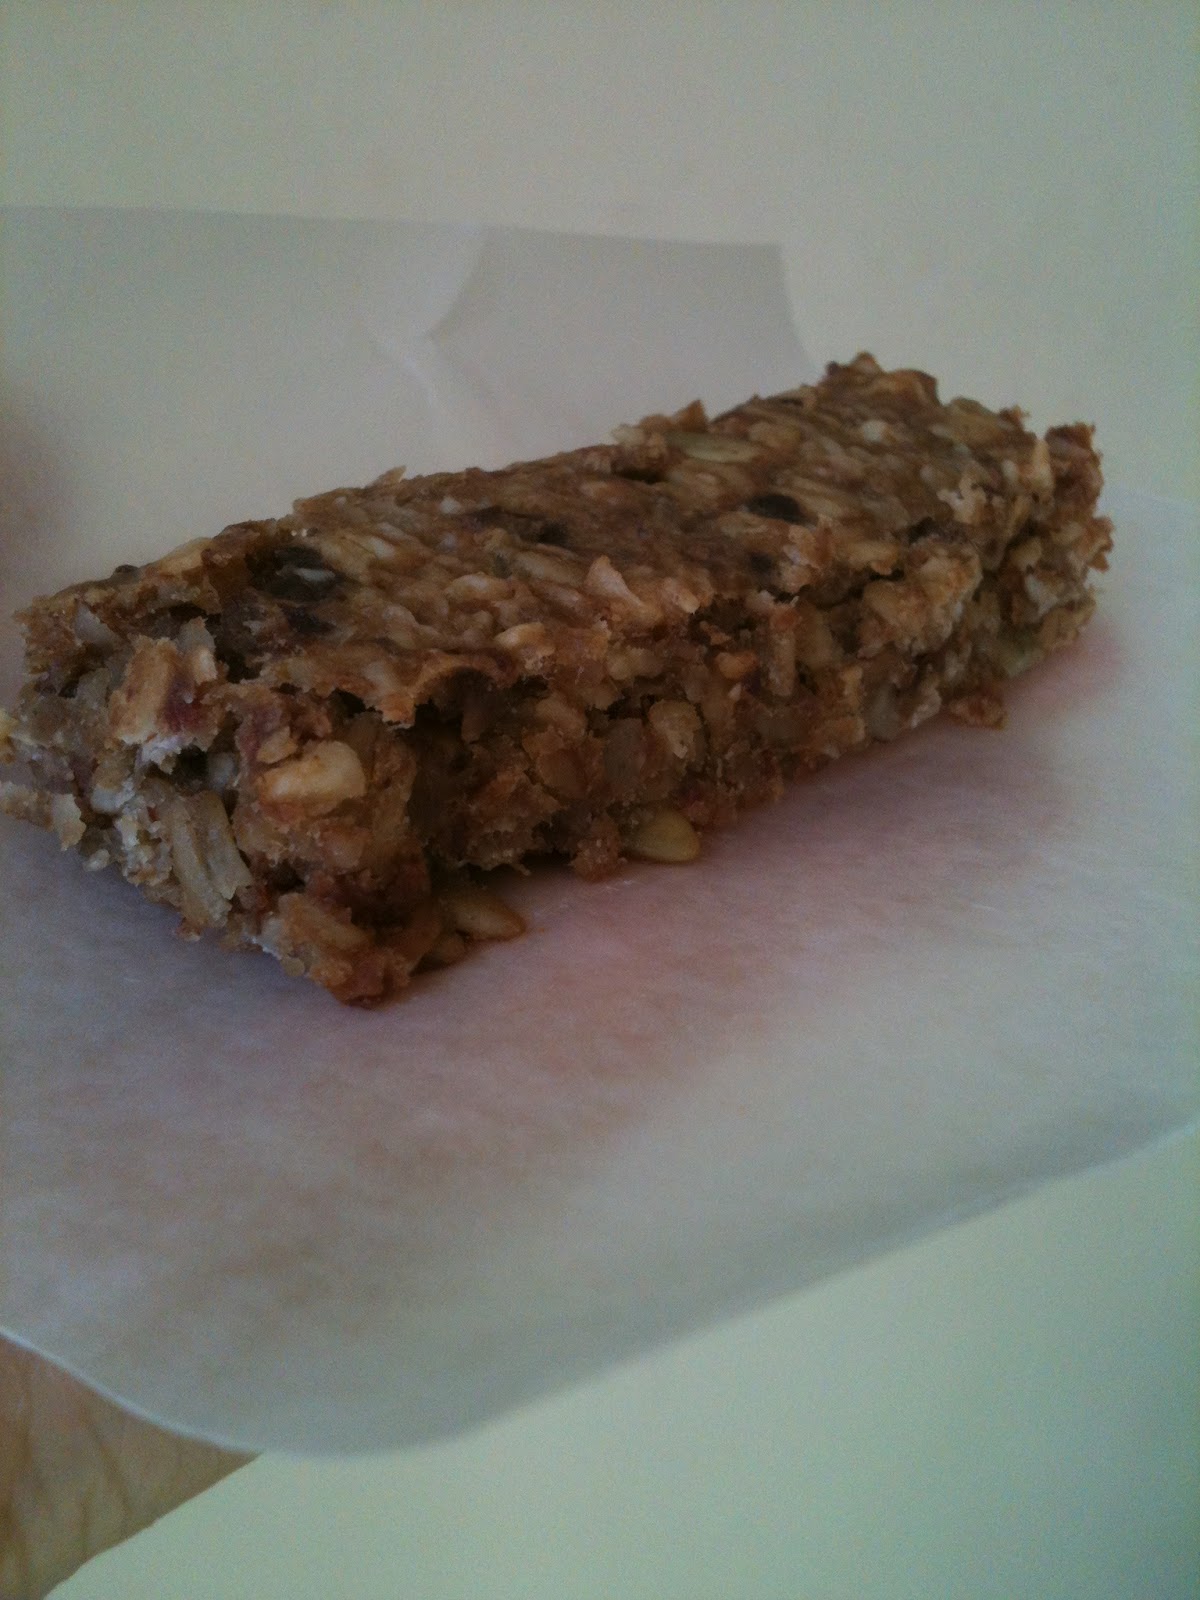
  7. Let cool completely before cutting.  Then, wrap individually in wax paper for healthy snacks that are ready to-go!

Using an 8x8" pan, I made 12 bars with this recipe.  I stored 5 bars in the fridge for the week in a ziploc bag.  The other bars I put in a ziploc bag in the freezer to keep them fresh.  I plan on replacing the bars in the fridge at the end of the week so I'll have more ready to-go snacks.  Of course the bars in the freezer would also be good if you plan on taking one with you but not eating it immediately; it will be thawed out by the time you're ready to eat it!

The batter before baking


I loved how you could taste every flavor throughout the entire bar with every single bite! 


Based on 1 bar:
Approximately 200 calories and 6.5g protein.

Thursday, September 27, 2012

Banana Nut Muffins

I love how versatile muffins are just by changing the ingredients used like the different fruit options, adding nuts or dried fruits, adding oats, adding cocoa powder, and sometimes even adding veggies.  I also love that muffins make a great part of a breakfast, can be a great portable snack, or a perfect treat at the end of a long day.  I also love that muffins are great to always have on hand just by keeping them in the freezer and taking them out the day before (or earlier in the day or reheating them in the microwave works too).


I wanted to make some muffins to have on hand to grab whenever I needed a quick breakfast, snack, or treat and decided I wanted one that had fruit and nuts.  Bananas and nuts sounded like a perfect combination, so when I came across this recipe online I  decided to give it a try!  I made a few changes to the original recipe and made regular sized muffins rather than the mini muffins.


The recipe was adapted from here:

Ingredients:
  • 1 large (about 9") banana (I used 1 1/2 banana as mine were quite small)
  • 1/3 cup almonds (soaked for at least a few hours)
  • 1/3 cup cashews (soaked for at least a few hours)
  • 1/4 cup flax seeds
  • 1/4 cup coconut sugar
  • 2 medjool dates, pitted
  • 2 tbsp almond milk
  • 1 tsp cinnamon
Directions:
  1. Preheat oven to 350F and prepare muffin tin with paper liners.
  2. Blend all ingredients in a high speed blender, scraping down sides as needed.
  3. Spoon the mixture into liners (note: the batter will not rise as these muffins cook)
  4. If desired, add banana slices to each muffin.  (I sliced up the other half of the banana I did not use earlier).
  5. Bake for about 20 minutes.
Variation: Top muffin with a "peanut butter frosting" made with
 2 tbsp PB2 and 1 tbsp almond milk


This might be a good recipe to double because it does not make very many muffins.  My batter only made 7.  However, this may be perfect if you are making these just for yourself and don't want too many muffins hanging around.

If you want a thicker frosting, add less almond milk.


I love how easy this recipe is, what can be simpler than throwing everything in a blender and mixing, not to mention the easy clean up!

Or try adding mini chocolate chips!  
This muffin was made for my mom who says everything is better with chocolate! Agreed!

Monday, September 24, 2012

Garlic Ginger Stir Fry

This Monday for Meatless Mondays from A to Z is Ginger for the letter G.


I have never really used ginger before unless you count ginger powder in pumpkin pie.  I was really excited to go out of my element here and try fresh ginger.  After researching recipes I came across a Garlic Ginger Stir Fry which sounded delicious.  I was excited to try out this stir fry because this is the first real stir fry I have ever made!  Normally if I'm in the mood for stir fry I'll just order take out or heat up a bag of frozen mixed veggies, put it on top of brown rice, and add some tamari.  I would definitely make this stir fry again!  It is so good with freshly made brown rice and freshly chopped vegetables all cooked in a garlic ginger sauce!

This recipe was adapted from here:

Ingredients:

  • 3 medium carrots, sliced
  • 2 cups broccoli, chopped
  • 3 stalks bok choy, sliced
  • 4 ounces mushrooms, sliced
  • 1 sweet red pepper, sliced
  • 2 teaspoons sesame oil
  • 1 medium onion, chopped
  • 4 cloves garlic, minced
  • 1 tablespoon fresh ginger, minced
  • 1 package tofu, baked
  • 1/2 cup tamari
  • 1/4 cup rice wine vinegar
  • 2 tablespoons cornstarch
  • 4 green onions, sliced
Directions:
  1. Prepare tofu by cutting it into cubes.  Then, marinate and bake tofu.  (I used the ingredients in this marinade but baked the tofu at 375F for 40 minutes flipping halfway through baking time.)
  2. While the tofu is baking, blanch carrots, broccoli, and bok choy in boiling water for 2-3 minutes and set aside.
  3. Heat the oil in a large pan over medium-high heat.  Add onion and saute until just tender.  Then, add garlic and ginger and continue cooking for another minute.
  4. Add tofu, mushrooms, and red pepper and cook for a few more minutes until everything is heated.
  5. Stir in blanched vegetables.
  6. Add tamari and vinegar and bring to a boil.
  7. In a small bowl, combine cornstarch with a little water.  Add mixture to the pan of veggies and stir until thick.
  8. Add green onions and serve over brown rice or rice noodles.

Don't be overwhelmed by all the ingredients.  Once everything is chopped, it does not take long to cook.  It also only requires one cutting board, a knife, and a pan so it is pretty easy clean up as well.  You can also prepare the veggies earlier in the week or day so that when you are ready to cook, you can just toss everything together!

All the veggies and tofu in the pot waiting to be served over brown rice!

The flavors of this stir fry were perfect together!

Saturday, September 22, 2012

Fruit on the Bottom Baked Oatmeal

Wow I haven't done an oatmeal recipe in a long time!  Even though I have been eating oatmeal about once or twice a week, it has just been oats prepared the night before with some kind of fruit mixture or pumpkin.  Nothing really special.  However, this recipe was a new one for me - Fruit on the Bottom Baked Oatmeal.  The original recipe calls for blueberries, which I did not have so I used blackberries, but of course any kind of fruit will work!


This recipe was adapted from Fit Foodie Finds:

Ingredients:

  • 1/4 cup gf rolled oats
  • 1/2 tsp chia seeds
  • 1/4 tsp vanilla extract
  • 1 tsp agave
  • 1/2 tsp cinnamon
  • 1/2 tsp baking powder
  • 1/2 cup almond milk
  • handful of blackberries (or other fruit)
Directions:
  1. Preheat oven to 375F.
  2. Mix all ingredients in a small bowl except for the fruit. (I actually stirred in a few blackberries.)
  3. Place a handful of blackberries in the bottom of a mason jar.
  4. Pour oat mixture on top.
  5. Bake for 30-35 minutes.  If you want it to be crispier on top, turn the oven to broil for the last 3 minutes of baking time.
  6. Top with additional blackberries, granola, nut butter, or any other topping you desire! (I topped mine with extra cinnamon!)


I actually made this the night before because I knew I would be pressed for time in the morning.  I just reheated it the next day in the microwave.  I would not recommend this since it looked and smelled so much better when it came out fresh from the oven.  What I do recommend (and what I will do next time) is prepare all the dry ingredients the night before in a small container and wash and put the fruit in the bottom of the mason jar so that is already to go.  In the morning, mix the dry oatmeal mixture with almond milk, pour it on top of the fruit, and bake while showering and getting ready for the day.  And if after baking it you don't have time to eat, it's already in a convenient jar which you can take with you and eat when you get to work!


Thursday, September 20, 2012

Chile Lime Hummus

I had a lime that needed to get used and I thought it would make a great addition to a hummus dip.  I was unsure of what other flavorings to add so I decided to do a quick Google search and came across a recipe that sounded interesting.  It is a Chipotle Lime Hummus, but I didn't have any chipotle seasonings so I adapted the recipe a bit and turned this hummus into Chile Lime Hummus.


This recipe is adapted from here:

Ingredients:
  • 1 can chickpeas, drained and rinsed
  • 1 clove of garlic
  • 5 drops Tabasco sauce
  • juice from 1 lime
  • 1/2 tsp dried chile powder
  • 1/4 cup water
  • 1 tsp tahini
  • 1 tsp olive oil
  • salt and pepper to taste
Directions:
  1. In a food processor, combine chickpeas, garlic, Tabasco sauce, lime juice, chile powder, and water.
  2. Blend to form a puree, scraping down the sides as needed.
  3. When a paste has formed, add the tahini, olive oil, salt and pepper.
  4. Blend until smooth and creamy and adjust seasonings if necessary.
So far I have enjoyed dipping veggies in this hummus and spreading the hummus on a corn tortilla with black beans and salsa to make a wrap.  Both ways were delicious.  This hummus would also be great to replace sauce for pizza, to top salads, or pretty much any other way you enjoy hummus!

Monday, September 17, 2012

Raw Fig Newtons

Another day of Meatless Mondays from A to Z and it is the sixth week.  The sixth letter in the alphabet starts with F for Figs!


Just this summer I had discovered figs (besides from the packaged Fig Newtons I used to eat) and they are amazing!  The first thing I thought about making with figs for today was Fig Newton Bars, but I have already made these before and wanted to try a new recipe with figs.  I still made Fig Newtons, but these one are raw and look more like the Fig Newtons I used to buy rather than bars.


 This recipe was adapted from Rawified:

Ingredients:

  • 1 cup figs
  • 1/2 cup almonds
  • 1/4 cup flax seeds
  • 1/4 cup gf rolled oats
  • 2 tbsp agave
Directions:
  1. In a food processor, blend figs with one tablespoon of water (if needed) to create a sticky and spreadable paste.  Put the paste into a small bowl and set aside.
  2. In the food processor, add almonds and blend to break them down into small pieces.
  3. Add flax seeds and oats and continue blending until a flour like consistency is reached.
  4. Add agave and blend until a dough forms.
  5. Place the dough between two sheets of wax paper and use a rolling pin to shape it into a large square.  (I trimmed along the edges to make a perfect square.  Then, used the extra dough to make more Fig Newtons.)
  6. Cut the square in half, so you have two rectangles.
  7. Take half the fig paste and spread it across one of the rectangles leaving a border along the longer sides of the rectangle.  Do not leave a border at the shorter sides of the rectangle.
.
    8.  Take the rest of the fig paste and do the same thing to the second rectangle.
    9.  Fold each of the rectangles over (lengthwise) and pinch the longest sides together.

   
   10.  Cut into bite sized pieces.


I made a total of 15 Fig Newtons (not counting the pieces of dough and fig paste I ate as I made these :-p)  Store these treats in an airtight container in the fridge for up to three or four days.

Almost like real Fig Newtons - only much better tasting and so much healthier!


Top View


I also have some extra fig paste left over.  Hmm...Overnight Oats? Pancakes? Oh the possibilities!!!


Saturday, September 15, 2012

Socca Pizza


I have seen several versions of socca bread online.  This is one of my favorite versions.  I love the seasonings  in the crust and how the edges get crispy but the middle is softer, which is how I like my pizza.  Even though the middle is softer, the crust still holds together completely!  Even with all the toppings!

Pizza with broccoli and olives!

Ingredients:
  • 1/2 cup garbanzo bean flour
  • 1/2 cup water
  • 1/8 tsp salt
  • 1 tbsp nutritional yeast
  • dash of paprika
  • dash of garlic powder
  • dash of parsley
  • dash of oregano
Directions:
  1. Preheat oven to 450F.
  2. Mix all ingredients together in a small bowl.  Pour into a nonstick 8" round springform pan.
  3. Bake for 20-25 minutes.
  4. Using a spatula, carefully transfer crust to pizza stone or cookie sheet.
  5. Add sauce, cheese, and any additional toppings.
  6. Bake for an additional 8-10 minutes.

Here's why I loved this second version better:
  1. I absolutely loved the seasonings in this crust (sorry I didn't make exact measurements), they all tasted terrific together though.
  2. It held together much better.  There were absolutely no cracks in the crust and it was very easy to handle.  I loaded up my pizza with veggies and the crust was firm enough that I could eat this without a fork.
  3. It wasn't too crispy (if you want a crispier version bake it a little longer), but it wasn't too soft either - just perfect!
  4. The ends of the crust didn't burn! Sometimes this happens because the middle takes longer to cook, but this crust cooked evenly!
I tried to take a picture so you could see how the crust is not that thick.  I used to love thick crust pizzas, and if I had the choice would probably still choose thick over thin.  However, this crust didn't have the too crispy taste of thin crust pizza but it was dense enough to be satisfying.

Pizza with broccoli!


This entire crust recipe yields approximately 247 calories and 15g protein.

Friday, September 14, 2012

Pulp Cracker Bread

I like to have a juice about once a week.  It's a good way for me to make sure I'm getting enough veggies, vitamins, and minerals; especially on weekends.  Lately, on Sunday's I start my day with a green juice.  Well, if you have ever juiced before you know that the point of juicing is to get only the juice out of the fruits and vegetables leaving behind the harder to digest parts, known as the pulp.  I do not like to just throw this pulp away because it would be a waste, plus it is full of fiber!  I've read that you can put it in a compost, create a veggie broth with it for soup, or turn it into crackers!  The last time I had a juice, I decided to try these crackers.


This recipe was adapted from Purely Twins:

Ingredients:
  • 2-3 cups pulp from juice
  • 1/2 cup ground flax seeds
  • 1 cup water
  • nutritional yeast
  • other spices, if desired
Directions:
  1. Preheat oven to 350F.
  2. Add all ingredients into a food processor and blend.  You can also just stir all ingredients together in a bowl if you don't have big pulp chunks.
  3. Spread the mixture onto a cookie sheet so you have one big thin rectangle.
  4. Drag a knife through the thin mixture to slice into crackers.  This will help the crackers break up easier after baking.
  5. Bake for about 45 minutes to 1 hour depending on how crispy you want your crackers.
  6. After baking, allow to cool, then break apart into crackers.

After I baked these, they were still quite soft which is why I call these cracker bread since they are more like bread.  However, since I wanted them more crispy for crackers, I ended up putting mine in my dehydrator at 115F for about 7 more hours.  Either way works though!


These crackers are best eaten the day they are made.  I also highly recommend using a sweeter pulp from a juice that has a lot of fruit, the crackers/bread will taste much better!  They also taste great with hummus!


Wednesday, September 12, 2012

Kidney Quinoa Patties

I love making my own bean burgers/patties.  They are easy and I get to control what I put in them, the flavorings and ingredients I like for different variations.  Even though they have a lot of ingredients, it's all seasonings and spices and really takes only a few minutes to put everything into a bowl and mix.  Then all you have to do is shape the patties and bake!  I have made these Black Bean Patties multiple times, but the last time I was in the mood for a bean burger, I wanted to try a different variation.  This recipe is very similar, but gives a whole new delicious burger.

This recipe was adapted from Happy Herbivore:

Ingredients:

  • 1/4 cup uncooked quinoa
  • 1/2 cup water
  • 1 15oz. can kidney beans, drained and rinsed
  • 2 tbsp barbeque sauce (I used Stubb's brand)
  • 2 tbsp ketchup
  • 2 tbsp tamari
  • 1 tbsp mustard
  • 1 tbsp Italian seasoning
  • 2 tsp garlic powder
  • 1 tsp onion powder
  • 1/2 tsp paprika
  • 1/3 cup gluten free instant oats (I used rolled oats and ground them for a few seconds in the food processor to break them down a bit)
Directions:
  1. In a small saucepan, combine quinoa and water and bring to a boil.  Once boiling, reduce the heat and simmer covered for about 15 minutes or until all water is absorbed.  (It helps to have this prepared ahead of time so it is ready and cooled for better mixing.)
  2. Preheat oven to 450F and grease a cookie sheet or line it with parchment paper.
  3. In a medium bowl, mash beans with a fork.  (I completely mashed most of the beans but left some whole/half beans for texture.)
  4. Add all other ingredients, including quinoa, and mix to combine.
  5. Form with hands into burger sized patties being careful not to make them too big or they will be hard to flip.
  6. Bake for 8 minutes, flip, and bake for an additional 8 minutes.  You may need to flip them one more time and bake for another 5 minutes if they are not crispy enough.  The patties will be done when they are brown and crisp on both sides.
With this recipe, I was able to make 6 regular sized patties and 1 small one :)  They had a great texture and held together very well!

These can be put between your favorite bread and add any toppings you wish!

Monday, September 10, 2012

Peanut Mandarin Rice Bowl

The fifth week in Meatless Mondays from A to Z is for the letter E and the food is Edamame!


I actually had a recipe I wanted to try from pinterest that had edamame in it so I knew this would be a perfect opportunity to make this rice bowl.


This recipe was adapted from here.  The original recipe is for a single serving.  I doubled the recipe so I would have leftovers.  I also sauteed the kale in balsamic vinegar.  Here's how I made my Peanut Mandarin Rice Bowl with Edamame:

Ingredients:
  • 1 1/2 cup cooked brown rice
  • 1 cup cooked shelled edamame
  • 1 cup kale leaves (I sauteed mine in balsamic vinegar)
  • 1/2 cup mandarin oranges
  • 2 tbsp chunky peanut butter
  • 4 tsp apple cider vinegar
  • salt and pepper to taste
Directions:
  1. Cook the brown rice and edamame according to the directions on the packages.
  2. If you want cooked kale, saute over medium high heat in balsamic vinegar for about 10 minutes.  
  3. In a large bowl, combine rice, edamame, kale leaves, and mandarin oranges.
  4. In a small bowl, combine peanut butter and apple cider vinegar and mix to combine.  It will be very thick, it might help to heat in the microwave for a few seconds.
  5. Pour the peanut mixture into the large bowl and gently mash the peanut mixture with the other ingredients until everything is evenly coated. (I found it easiest to do this with my hands).
  6. Enjoy this meal hot or cold!
This recipe was tasty, quick (especially if you cook the rice ahead of time and don't saute the kale), and had minimal clean-up.  I will be making this meal a lot in the future!  Maybe next time I'll even try using baby spinach leaves instead of kale leaves!


Saturday, September 8, 2012

Buckwheat Porridge

Even though buckwheat has the word "wheat" in it, it is actually a naturally gluten-free seed even though many people think it is a grain. It can be eaten as a topping for salads or yogurt, or you can turn it into a creamy porridge.  That is exactly what I did as a delicious and very filling breakfast after I came across a blog with this amazing recipe.


Buckwheat is great when you want to switch it up from the normal oatmeal.  And just like oatmeal, you can add any flavorings, fruits, etc. to create different variations!

This recipe was adapted from Oh She Glows.  Here's the recipe I used to make one serving:

Ingredients:
  • 1/4 cup buckwheat groats
  • 1/2 cup water
  • 2 1/2 tablespoons almond milk
  • 3/4 teaspoon chia seeds
  • 1/8 teaspoon vanilla
  • 1/2 tablespoon agave, or to taste
  • 1/8 teaspoon cinnamon
  • Optional: fresh fruit, dried fruit, nuts, seeds, nut butter, coconut flakes, chocolate chips, granola, etc.
Directions:
  1. In a bowl, combine buckwheat groats and water.  Soak for at least 1 hour or overnight.
  2. After an hour (or in the morning), rinse the buckwheat groats very well in a strainer several times.
  3. Combine the buckwheat groats, almond milk, chia seeds, and vanilla in a food processor and blend until slightly smooth.
  4. Stir in the agave and cinnamon adjusting to your taste.
  5. Serve cold with any optional toppings! 
If you want to have more texture, I recommend only blending slightly more than 1/2 the buckwheat groats.  Then, when you stir in the agave and cinnamon you can add the remaining buckwheat and stir everything together.


 I also thought it would be important to note that I was reading the comments about this porridge for the original recipe and someone commented that they tried heating this up in the microwave and it just stuck together into a ball.  Another person said they heated it in the microwave and just added more almond milk to thin out the porridge and that worked.  I haven't tried this porridge warm so I'm not sure how this method would turn out for me.

I added raspberries to mine.  After I stirred it, I thought it looked 
like Raspberries and Cream Buckwheat Porridge!

Wednesday, September 5, 2012

Cranberry Orange Quinoa Salad

Here's a great quick lunch idea!  It has veggies, fruit, healthy fats, and lots of protein!


This recipe was adapted from here:

Ingredients:
Directions: Combine cooked quinoa with baby spinach and a chopped clementine.  Then, top with dried fruit and sliced almonds.

I didn't measure out the ingredients, just tossed in what I wanted.  See the original recipe if you want exact amounts. 

This can be eaten hot or cold.

Monday, September 3, 2012

PB&J Yogurt Parfait

Peanut butter and jelly first thing in the morning!  This is my kind of parfait and it looks so pretty in this jar!


This recipe was adapted from here:

Ingredients:
  • 1/4 cup gf rolled oats
  • 1/4 cup almond milk
  • 1/4 tsp vanilla extract
  • dash of ground cinnamon
  • 1 tsp chia seeds
  • 1/2 cup yogurt (I used Silk vanilla soy yogurt)
  • 1/4 cup diced strawberries
  • 1/4 cup diced blueberries
  • 1/2 tbsp peanut butter
Directions:
  1. In a bowl, combine oatmeal, milk, vanilla, chia seeds, and cinnamon.  Stir together, cover, and leave in the fridge overnight.
  2. In the morning, layer your parfait in this order:
    • 1/4 cup yogurt
    • half the strawberries
    • half the blueberries
    • oatmeal
    • peanut butter
    • 1/4 cup yogurt
    • the other half of the strawberries
    • the other half of the blueberries
    • sprinkle of granola (if desired)

I used half a serving of each of the berries from the original recipe.  I didn't use a big enough jar to hold a full cups worth!  It's not necessary to be exact in any of the measurements either (except probably for the oats).  You can just toss in how much yogurt, berries, peanut butter, and granola you want and layer it in whatever order works for you!  Yogurt parfaits are so versatile!

The best thing about this parfait (or any fruit and yogurt parfait) is it isn't just for breakfast - it can be a snack or even a healthy dessert!


If you're in a rush or don't want to take the time to make a parfait, you can also make this into a yogurt bowl. Just toss all the ingredients into a bowl.  When I did this option I didn't measure out the ingredients and I just left out the oats.

Quick, easy, and just as tasty!


Sunday, September 2, 2012

Eggplant Bacon

I was never interested in eggplant.  The first time I ever saw it (or knew what it was) was in chinese food.  It just looked slimy and not appetizing to me at all.  This was years ago.  Now, I'm open to more foods and I have been trying eggplant in different ways, like as a base for crust for pizza.  Even though eggplant still isn't my favorite, I do try to eat it once in awhile.  It is such a healthy food - tons of fiber and B vitamins.


The other day I came across a recipe for Eggplant "Bacon" which is just dehydrated eggplant.  Since I recently bought a dehydrator I decided to give this recipe a try.  Plus this would be my first time dehydrating a vegetable!


This recipe was adapted from Choosing Raw:

Ingredients:
  • 1 large eggplants, sliced in thin rounds or strips (about 1/4 inch thick)
  • 2 tbsp tamari
  • 2 tbsp maple syrup
  • 2 tbsp cider vinegar
  • 2 tbsp olive oil
  • 1 tsp paprika
  • 1 tsp garlic
  • pinch of black pepper, to taste
Directions:
  1. Mix all marinade ingredients together.
  2. Submerge eggplant slices in marinade and marinate for at least an hour or overnight.
  3. Place slices in a dehydrator at 115 degrees until desired texture and crispyness (about 12 hours).

I'm sure you could also bake this in the oven if you do not have a dehydrator.  You could eat this plain as a snack or make an EBLT (Eggplant Bacon Lettuce Tomato) sandwich!  Since I cut my eggplant into circles, they were more like eggplant "chips".  Maybe next time I'll cut them into strips.


I was amazed at how good this tasted, I guess since it was eggplant I wasn't expecting to like it too much.  I think this is now my favorite way to eat eggplant!