Sunday, March 24, 2013
New Blog
I am currently transitioning my blog to a wordpress account and will no longer be posting here. My blog here on blogger will be deleted but I will keep all the same information at my wordpress blog. Please check me out at my new website here!
Wednesday, March 20, 2013
PB Banana Avocado Wrap
Today's post is not really a recipe, it is actually a wrap I made and I absolutely loved the combination. Usually I enjoy wraps/sandwiches for lunch, but I actually had this one for breakfast and I really enjoyed it at that time of the day. This wrap had so many of my favorite foods all together and provided healthy fats, carbs and protein to keep me satisfied and energized all morning.

Ingredients:
I know this sounds like a weird combination with the avocado, but it paired really well with the peanut butter and banana. If you love peanut butter, bananas, and avocados I'm sure you will love this wrap as much as I did! I also highly recommend the coconut and peanut spread because it gave this wrap a tropically taste with the banana and avocado. Coconut, banana, and avocado make me think of laying out in the sun on a beach...
This recipe yields approximately 375 calories and 6.5g protein.

Ingredients:
- 1 brown rice tortilla wrap
- 1 tbsp peanut butter, or more (I used Earth Balance Coconut & Peanut Spread)
- 1/4 avocado, mashed
- 1 small banana, sliced
Directions:
- Heat brown rice tortilla in the microwave for about 25 seconds. (This helps soften it so it will fold better.)
- Spread peanut butter on the wrap. Then, spread on the avocado and top with the banana slices.
- Wrap it all up and enjoy!
I know this sounds like a weird combination with the avocado, but it paired really well with the peanut butter and banana. If you love peanut butter, bananas, and avocados I'm sure you will love this wrap as much as I did! I also highly recommend the coconut and peanut spread because it gave this wrap a tropically taste with the banana and avocado. Coconut, banana, and avocado make me think of laying out in the sun on a beach...
This recipe yields approximately 375 calories and 6.5g protein.
Saturday, March 16, 2013
Buckwheat Waffles
I love making pancakes. Unfortunately, they are very time consuming so they do not get made except for weekends. And trust me, it seems like more Sundays than not I am cooking up some delicious pancakes. However, pancakes can be very tricky to make. You have to be very careful flipping them, they can burn easily, the outside has to cook enough not to burn but enough so the middle isn't gooey. Now let's add to that and try to make vegan and gluten free pancakes. Even trickier! Especially if you would prefer not to spend a ridiculous amount of money on boxed packages of gluten free pancake mix. And most gluten free pancake mixes call for eggs or might already have powdered milk in their flour. So how is it possible to enjoy a fluffy vegan and gluten free waffle? Well through lots of trial and error, I think I finally figured it out! Hopefully if you are looking for a tasty, fluffy vegan and gluten free waffle, this recipe will save you lots of time!
I recently bought a waffle maker because I was tired of the outside burning, the inside being gooey, and the difficulty of flipping. After several trials on my waffle maker, I was still getting the same results minus the fact that I didn't have to do any flipping. I almost accepted the fact that I just wasn't going to be able to enjoy a fluffy waffle anymore, but would just have to deal with a very crispy-on-the-outside and gooey-on-the-inside waffle. It was still tasty after all, especially when I added peanut butter flour mixed with almond yogurt and sliced a banana on top.
Well then I discovered buckwheat flour!
This recipe was adapted from here:
Ingredients:
- 1/4 cup buckwheat flour
- 1 tbsp ground flax seed
- 1/2 tsp cinnamon
- 1/4 tsp baking soda
- 1/4 tsp baking powder
- 1 tsp pure maple syrup
- 1/4 tsp vanilla extract
- 4 tbsp almond milk
- 1/2 mashed banana
Directions:
- Combine all ingredients in a small bowl and mix until well combined.
- Heat waffle iron and spray with non-stick spray.
- Pour batter into waffle iron and cook according to your waffle iron's directions.
I topped my waffles with peanut butter yogurt (2 tbsp almond yogurt, 1 tbsp almond milk, and 1 tbsp peanut butter flour) the other 1/2 banana sliced, and a sprinkle of cinnamon. Maple syrup and other fruits or even nuts would also be great on these waffles! I'm sure this batter could also be used to make pancakes if you do not have a waffle maker.
I didn't take a picture because after all my failed attempts I didn't think this one would work either and I was hungry and just wanted to eat. But a picture will be up sometime soon in the future because this was a really tasty waffle and I cannot wait to make it again!
This recipe makes one waffle and yields approximately 230 calories and 7g protein.
Thursday, March 14, 2013
Baked Vegetable Stew
This past Saturday, I posted a recipe for Tomato Soup. I thought it was kind of ironic that I posted this soup recipe on a day that it was 60 degrees outside. However, I figured it would be a good chance to get in at least one more soup recipe before the winter ends. Well after this weekend, the temperatures haven't been that warm and have been quite windy. I don't think we even got into the 50s (maybe just on Monday).
I guess I had been wishing for warmer weather a little too early, especially now that we have an extra hour of daylight. But since we are not quite to that warm weather yet and we still have 5 more days until the first day of Spring! I am going to post one more stew recipe I enjoyed this winter. This recipe was super easy to make and would make a great last comfort meal to celebrate the end of winter.

This recipe was adapted from here:
Ingredients:
- 2 tbsp olive oil
- 1 red medium onion, finely chopped
- 4 potatoes, chopped
- 2 medium carrots, chopped
- 4 cloves garlic, minced
- 1 vegetable stock cube dissolved in 1/4 cup hot water
- 3 cups petite peas, frozen
- 3 tbsp tomato paste
- 2 cups water, divided
- pinch of paprika
- salt, to taste
Directions:
- Heat oil in a large saucepan. Add onion and saute for about one minute.
- Add the rest of the veggies and lower heat, stirring about every minute.
- Mix in the remaining ingredients, except for the water.
- Cover and allow to cook for about 5 minutes, stirring about every minute.
- Add half the water (one cup), lower the temperature, and allow to cook for 30 minutes.
- Add the other half the water and stir.
- Pour mixture into a large baking dish. Bake in oven at 200F for about an hour, or until the potatoes are soft.
One thing I really like about this recipe is you can easily swap the peas and carrots for different veggies if you would prefer. Or maybe even add extra veggies like some corn!
I am roughly estimating this recipe makes 4 entree servings. However, this recipe can also be made into 8 smaller side dish servings.
One entree serving yields approximately 306 calories and 11g protein.
Tuesday, March 12, 2013
Spirulina Oatmeal
Here is another recipe with Spirulina. I posted my first recipe using spirulina here and talked about the benefits of this ingredient. I have been adding spirulina to so many things lately, even my oatmeal! I love all the nutrition I get first thing in the morning by adding spirulina to my breakfast.

This recipe was adapted from here:
Ingredients:

This recipe was adapted from here:
Ingredients:
- 1/4 cup GF rolled oats
- 3/4 cup almond milk
- dash of sea salt
- 1/2 tbsp chia seeds
- 1/2 tbsp flax seeds
- 1 tbsp almond butter
- 1 small banana, mashed
- 1 tsp spirulina
Directions:
- In a breakfast bowl, combine oats, almond milk, sea salt, chia seeds, and flax seeds.
- Place in the refrigerator overnight.
- In the morning, add more liquid if needed or if desired. Then, stir in almond butter, banana, and spirulina.
This is a recipe for cold oatmeal, however it can also be eaten warm if that is what you prefer. I still recommend letting the oats soak overnight with the chia and flax seeds, but before stirring in the other ingredients in the morning, heat the oatmeal for about a minute and a half first. Then stir in the almond butter, banana, and spirulina.
If you don't have spirulina you can still make this delicious breakfast. You can either order some at iherb using my code LWZ362, or just sub the ingredient with spinach. I recommend blending the spinach with the oats, almond milk, and seeds then placing it in the fridge overnight.
This recipe yields approximately 385 calories and 9g protein.
Sunday, March 10, 2013
Broccoli Sticks
Yesterday, I posted about a Tomato Soup I recently made. It was such a light soup that I decided to make some "breadsticks" to go along with the soup. These "breadsticks" had no grains and were actually really Broccoli Sticks, or baked broccoli shaped into sticks...

This recipe was adapted from here:
Ingredients:
This was a fun new way to eat broccoli! Plus, I love that they are shaped like breadsticks but are so much healthier than regular breadsticks and they are green! I love green food and eating green "breadsticks" is so much fun!
These may not have looked the prettiest but they were definitely tasty, especially dipped into the tomato soup. These also taste great plain or I actually even enjoyed dipping them into ketchup!
Based on making 15 "breadsticks", each "breadstick" yields approximately 22 calories and 1.5g protein.

This recipe was adapted from here:
Ingredients:
- 2 tbsp chia seeds + 6 tbsp water
- 1 head of broccoli (4 cups, chopped)
- 1/4 cup nutritional yeast
- 2 tbsp water
- garlic powder, to taste
- sea salt, to taste
- 1/2 tsp baking powder
Directions:
- In a small bowl, mix together chia seeds and water. Set aside for at least 15 minutes to allow it to gel.
- Chop the broccoli and discard the stems. Place broccoli florets into a food processor and pulse a few times until the texture is similar to rice.
- Add in the nutritional yeast, water, and chia seed mixture and pulse until well combined.
- Season with garlic powder and sea salt and pulse to combine.
- Add in baking powder and pulse a few times to mix together.
- Preheat oven to 375F and spray a baking sheet with non-stick spray.
- Spread mixture evenly onto baking sheet using a spatula to make it as thick or thin as you like.
- Run a knife through the mixture to form "breadsticks". (This will make it easier to break apart after they bake.)
- Bake in oven for 20 minutes.
- Using a spatula, carefully break apart the "breadsticks" and flip them over. Bake for an additional 15 minutes.
This was a fun new way to eat broccoli! Plus, I love that they are shaped like breadsticks but are so much healthier than regular breadsticks and they are green! I love green food and eating green "breadsticks" is so much fun!
These may not have looked the prettiest but they were definitely tasty, especially dipped into the tomato soup. These also taste great plain or I actually even enjoyed dipping them into ketchup!
Based on making 15 "breadsticks", each "breadstick" yields approximately 22 calories and 1.5g protein.
Saturday, March 9, 2013
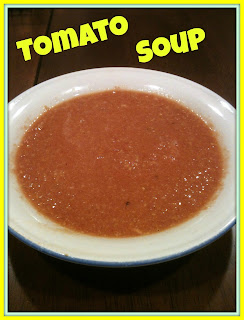
Tomato Soup
I almost didn't post this soup recipe today because it is absolutely gorgeous outside! High 50s/Low 60s and sunny with no wind! Wow! Haven't seen a day like this in forever and I am absolutely loving it! Spring is definitely in the air and I can totally feel it as I relaxed on the back porch this afternoon soaking up some sun and relaxing with a good book. Knowing that we spring the clocks forward an hour tomorrow makes today even that much better. Sure we lose an hour but hello sunlight!
With all that said (if you can't tell I'm extremely excited for this warm weather) I figured I would post this soup recipe anyway since this may be the last chance you actually want to make soup before saying goodbye until next winter when soups become popular again. Not only is this soup tasty, but it is super easy to make which makes it great to make if you don't have much time but want something nutritious.
This recipe was adapted from here:
Ingredients:
With all that said (if you can't tell I'm extremely excited for this warm weather) I figured I would post this soup recipe anyway since this may be the last chance you actually want to make soup before saying goodbye until next winter when soups become popular again. Not only is this soup tasty, but it is super easy to make which makes it great to make if you don't have much time but want something nutritious.

This recipe was adapted from here:
Ingredients:
- 1 15oz can chickpeas, rinsed and drained
- 2 28oz cans fire-roasted tomatoes
- 2/3 cup nutritional yeast
- 3 cups vegetable broth
- 2 tsp chili powder
- garlic powder, to taste
- salt and pepper, to taste
Directions:
- In a blender, blend chickpeas until broken down.
- Add the remaining ingredients, except the garlic powder, salt, and pepper, and blend until smooth and creamy.
- Pour into a large pot and heat until warm. Season with garlic powder, salt, and pepper and/or any other seasonings you desire. Alternatively, you can pour the soup right from the blender into individual bowls and heat in the microwave for an even quicker meal.
I doubled this recipe since it is such a light soup and the original recipe only made 1-2 servings.
This soup makes 12 cups. Based on a 2 cup serving, this recipe yields approximately 193 calories and 11.5g protein.
Wednesday, March 6, 2013
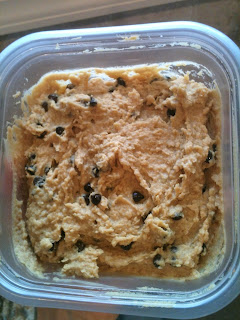
Avocado Brownies
I absolutely love putting avocados in desserts! It makes them super creamy and adds some healthy fat. I usually put avocado in chocolate pudding but this time i wanted to try putting avocado in a different dessert, brownies! These brownies were eaten so fast, everyone loved them! I have to go buy more avocados to make this tasty treat again!

This recipe was adapted from here. I made a few changes to the original recipe. Here is how I made my Avocado Brownies:
Ingredients:


This recipe was adapted from here. I made a few changes to the original recipe. Here is how I made my Avocado Brownies:
Ingredients:
- 1/3 cup GF rolled oats
- 3/4 cup black beans
- 1 mashed avocado
- 1/4 cup cocoa powder
- 2 tbsp ground flaxseed + 6 tbsp water
- 1 tsp vanilla extract
- 1/3 cup raw sugar
- 1/4 cup mini chocolate chips, divided (or more!)
- 1/2 tsp salt
- 1/2 tsp baking powder
Directions:
- Preheat oven to 350F. Grease a 9x9 inch square pan and set aside.
- In a small bowl, mix together the ground flaxseed and water and set aside.
- In a food processor, process the oats into a flour. Add the beans and process until very smooth.
- Add the mashed avocado, cocoa powder, flaxseed mixture, vanilla extract, and sugar to the food processor and blend until smooth.
- Melt 2 tbsp of the chocolate chips in the microwave. Add to the food processor and blend.
- Add the salt and baking powder and pulse until they are incorporated.
- Stir in the other 2 tbsp of chocolate chips.
- Pour the batter into the prepared pan and use a spatula to distribute it evenly and make sure it is smooth.
- Bake for about 25 minutes. Allow to cool before slicing.

I know the combination of black beans and avocado may sound unusual, but don't be scared off! You cannot even taste the black beans, all you will taste is creamy chocolate! And of course you can always add extra chocolate chips into the batter before baking!
This recipe yields 9 brownies. One brownie yields approximately 128 calories and 3g protein.
Monday, March 4, 2013
Seedy Granola
I love making granola! Since I make yogurt bowls a lot, I love adding fresh granola to each yogurt bowl for some added crunch, so I go through it quite a bit. This is why homemade granola is so much better than store-bought. It is much cheaper to make my own, plus I love being able to control the different ingredients I put into the different types of granola I make each time.
This granola is not one of my favorites, I think it was more like a savory granola than a sweet granola, and I am totally a sweet snack kind of girl. However, it was still very tasty and I love how all the nuts and seeds give this granola so many healthy nutrients!
This recipe was adapted from here:
Ingredients:
- 1 cup GF rolled oats
- 1/4 cup raw almonds
- 3 tbsp pecans
- 2 tbsp pepitas
- 1 tbsp chia seeds
- 1 tbsp hemp seeds
- 1.5 tsp cinnamon
- 1/4 tsp ground nutmeg
- 1/4 tsp salt
- 1 tbsp ground flax seeds + 2 tbsp water
- 3 tbsp maple syrup
- 1/2 tsp vanilla
Directions:
- Preheat oven to 325F and line a baking sheet with aluminum foil.
- In a small bowl, combine the flax and water. Set aside to thicken.
- In a small food processor, combine almonds, pecans, and pepitas. Pulse for just a few seconds to roughly chop up the nuts and pepitas.
- In a large bowl, combine oats, nuts, seeds, spices, and salt. Set aside.
- Grab the small bowl with the flax. Add maple syrup and vanilla extract and stir to combine.
- Pour the wet ingredients into the dry ingredients. Mix together until everything is well combined.
- Spread granola onto prepared baking sheet and bake for 15 minutes. Remove from the oven, stir, and continue baking for 5-15 minutes, keeping in mind that it will continue to crisp as it cools.
- Allow granola to cool completely before storing in an airtight container.
I know there are a lot of ingredients in this granola, but it is worth the few extra minutes to mix everything together for a granola with a lot of flavor.
(Picture Coming Soon)
Based on a 1/4 cup serving, I am roughly estimating that this granola yields approximately 106 calories and 3g protein.
Saturday, March 2, 2013
Pina Colada Banana Yogurt
I began this blog over a year ago as a place for me to keep my favorite recipes. Having this collection online has been a great place to store recipes instead of having endless pieces of paper shoved in a folder or binder that can get ruined or lost. Plus, it can take forever to find the specific recipe you want if you have to flip through endless recipes. This blog has allowed me to easily find recipes that I have made before with just a few clicks so I can enjoy them again. Another benefit to having a recipe blog online is I have access to it anytime and anywhere.
Pretty much up until this point, I have always recreated recipes that I have found online with minimal changes to suit my taste buds/preferences. However, there are several recipes that I make that seem so simple that I wouldn't really call it a recipe, but I enjoy the meal/snack so much that I would love to make it again. I have decided to start including these "recipes" on my blog so that I can enjoy some of my favorites over and over again. Plus it might give others who stumble upon my blog some good ideas for interesting new meal or snack ideas. This might also be helpful to new vegans or others who may just be discovering a gluten intolerance and may not have any idea of the endless amounts of food that can still be enjoyed.
Today, I have decided to share a snack, Pina Colada Banana Yogurt, that is not really a recipe, but it was a delicious combination!

Here is how I made this yogurt snack:
Ingredients:
Once again, this is not really a recipe. Anyone can toss together any fruits/toppings into yogurt. Most people might find the convenience of buying prepackaged yogurts much easier to buy, but I enjoy creating my own versions and having control over the ingredients. It really only takes an extra few minutes to mix all the ingredients together. I hope you enjoy this yogurt snack as much as I did if you choose to try it out!
Pretty much up until this point, I have always recreated recipes that I have found online with minimal changes to suit my taste buds/preferences. However, there are several recipes that I make that seem so simple that I wouldn't really call it a recipe, but I enjoy the meal/snack so much that I would love to make it again. I have decided to start including these "recipes" on my blog so that I can enjoy some of my favorites over and over again. Plus it might give others who stumble upon my blog some good ideas for interesting new meal or snack ideas. This might also be helpful to new vegans or others who may just be discovering a gluten intolerance and may not have any idea of the endless amounts of food that can still be enjoyed.
Today, I have decided to share a snack, Pina Colada Banana Yogurt, that is not really a recipe, but it was a delicious combination!

Here is how I made this yogurt snack:
Ingredients:
- 1/2 cup non-dairy yogurt
- 1/2 can 8oz diced pineapple chunks
- 1 tbsp shredded coconut
- 1/2 sliced banana
- 2 tbsp granola (Any kind will do but I used Seedy Granola)
Directions:
- Drain can of pineapple chunks.
- Mix together all ingredients in a bowl and enjoy!
If you like sweeter yogurt bowls, add some sweetener like stevia or agave. Or you can leave some of the juice from the pineapple to use a more natural sweetener. I personally didn't need any extra sweetener with how sweet the pineapple and banana were, plus I used sweetened coconut.
Once again, this is not really a recipe. Anyone can toss together any fruits/toppings into yogurt. Most people might find the convenience of buying prepackaged yogurts much easier to buy, but I enjoy creating my own versions and having control over the ingredients. It really only takes an extra few minutes to mix all the ingredients together. I hope you enjoy this yogurt snack as much as I did if you choose to try it out!
Sunday, February 24, 2013
Pad Thai Sauce

I do not remember where I saw the original recipe. I actually took bits and pieces of a few pad thai sauces I saw online to create my own to suit my own taste. Here's how I made my Pad Thai Sauce:
Ingredients:
- 2 tbsp water
- 2 tbsp Bragg's Liquid Aminos
- 1.5 tbsp natural peanut butter (I used Peanut Butter & Co.)
- 1 tsp sriracha
- 1/4 tsp garlic powder
- 1/4 tsp ginger
Directions:
- Combine all ingredients together in a small bowl and mix with a fork until well combined. (You may need to melt the peanut butter in the microwave for a few seconds first to help it mix with the other ingredients better.)
- Pour the sauce over rice or pasta, beans, and veggies.
I used this sauce over thin noodles with carrots, broccoli, and chickpeas. This is such a great meal. It has healthy fats, carbs, and veggies!

This entire sauce recipe yields approximately 140 calories and 4.5g protein.
Saturday, February 23, 2013
Cashew Cookie Bars
I love making my own snack bars, but sometimes it is very difficult to make bars that are portable. Even though I have made bars before that I individually wrapped, if I didn't eat them straight from the fridge or freezer they would fall apart. That is not the case with this bar. I stored these in the fridge, but I took it as a snack during work and I was surprised at how well the bar not only stayed together, but was still firm!
When I first made these bars, I was a little nervous as to whether or not I would like them since cashews are my least favorite nut. However, they had an amazing taste, especially paired with the cinnamon spice. I am a huge fan of cinnamon!

This recipe was adapted from here:
Ingredients:

When I first made these bars, I was a little nervous as to whether or not I would like them since cashews are my least favorite nut. However, they had an amazing taste, especially paired with the cinnamon spice. I am a huge fan of cinnamon!

This recipe was adapted from here:
Ingredients:
- 1/2 cup raw cashews
- 2 tbsp hemp seeds
- 1/8 tsp sea salt
- 1 tsp cinnamon
- 1/2 cup GF rolled oats
- 1 cup pitted dates*
- 1/2 tsp vanilla extract
- 2 tbsp shredded coconut
- 2 tbsp mini chocolate chips (I use Enjoy Life brand)
Directions:
- In a food processor add cashews, hemp seeds, salt, cinnamon, and oats and process until crumbly.
- Add dates and vanilla and process until well-combined and a sticky dough forms.
- Add the coconut and chocolate chips and process for a few more seconds.
- Remove the dough and press into an 8x8 pan.
- Refrigerate for at least an hour or until chilled.
- Remove from fridge and cut into 6 bars and wrap each individually in wax paper. Store each wrapped bar in a ziplock bag in the fridge until ready to eat.
* I recommend soaking the dates in warm water for at least 30 minutes before mixing in the food processor so they are soft and mix with the other ingredients better. Alternatively, you can heat them in the microwave for about 30 seconds to help soften them.

You can also turn this dough into bite sized snack balls instead of bars.
This recipe makes 6 bars.
One bar yields approximately 202 calories and 4.5g protein.
Friday, February 22, 2013
Chocolate Almond Butter Banana Shake
Lately when I have been making smoothies, I have been making them so thick that they can be eaten out of a bowl with a spoon with some granola, nuts, or chopped fruit on top to add some crunch. However, tonight I was craving a smoothie that could be sipped out of a glass with a straw. I still wanted a thick smoothie because sometimes smoothies that are too thin can go down way too fast and I really wanted something that would last and have some staying power.
I knew if I used a frozen banana I would have a great base for a creamy, thick shake. I also decided to use some almond yogurt in place of almond milk since yogurt has a creamier, thicker consistency than almond milk. Cocoa powder and almond butter added to this shake by giving it flavor, protein, and some staying power.
Not only are these ingredients all packed with nutrition, but when combined they make for a very tasty treat! This smoothie can be enjoyed pre or post workout, as a regular snack, as a dessert, or doubled and maybe blended with some oats to be more filling for a meal replacement smoothie.
Ingredients:
Directions:
I know there are tons of recipes for chocolate peanut butter and banana smoothies, but this one was exactly what I was craving and I want to remember the recipe for the future. (I know I'll be making this again!) I got the thick, creamy smoothie with the perfect amount of sweetness from the banana without any added sugar in any form, not even from extracts or stevia.
This recipe can also be easily adapted to suit your cravings.
I knew if I used a frozen banana I would have a great base for a creamy, thick shake. I also decided to use some almond yogurt in place of almond milk since yogurt has a creamier, thicker consistency than almond milk. Cocoa powder and almond butter added to this shake by giving it flavor, protein, and some staying power.
Not only are these ingredients all packed with nutrition, but when combined they make for a very tasty treat! This smoothie can be enjoyed pre or post workout, as a regular snack, as a dessert, or doubled and maybe blended with some oats to be more filling for a meal replacement smoothie.
Ingredients:
- 1 frozen banana
- 1/4 cup non-dairy yogurt (I used plain Amande)
- 3/4 cup almond milk
- 1 tbsp almond butter (I used Maranatha)
- 1 tbsp cocoa powder (I used dark cocoa)
Directions:
- Combine all ingredients in a blender.
- Process until smooth and creamy, without overblending.
- Pour into a glass and enjoy!
I know there are tons of recipes for chocolate peanut butter and banana smoothies, but this one was exactly what I was craving and I want to remember the recipe for the future. (I know I'll be making this again!) I got the thick, creamy smoothie with the perfect amount of sweetness from the banana without any added sugar in any form, not even from extracts or stevia.
This recipe can also be easily adapted to suit your cravings.
- For a thinner shake, add more almond milk.
- For a thicker shake, add more yogurt or banana.
- If you like added sweetness, add almond extract (or another kind), stevia, agave, or another sweetener.
- For more flavor, add extra cocoa powder or almond butter.
- Try a different kind of nut butter.
- Turn this smoothie into a Chocolate Banana Smoothie by omitting the nut butter.
- Turn this smoothie into an Almond Butter Banana Smoothie by omitting the cocoa powder.
- Double the recipe and maybe add some oats for a meal replacement.
- Add spinach to sneak in some extra veggies (you won't even taste the spinach).
- Omit the almond milk, blend all other ingredients together, and turn this smoothie into frozen yogurt to be eaten out of a bowl.
- Omit the almond milk and yogurt, blend all other ingredients, and it will resemble soft serve to be eaten out of a bowl.
Sorry there is no picture. I didn't realize I would love this smoothie exactly how I made it and would want to post the recipe. But don't worry I'll be making it again soon and will definitely get a picture then. But for now just imagine thick, creamy dark chocolate milk!
Based on using original Silk PureAlmond milk, plain Amande Cultured Almondmilk, and Maranatha Natural Almond Butter, this recipe yields approximately 288 calories and 7g protein.
Monday, February 18, 2013
PB&J Apple Oatmeal
Peanut butter goes well with so many fruits. My favorite combination is peanut butter and banana. My second favorite combination is peanut butter and apple. One morning I was trying to decide what oatmeal combination I wanted and was torn between a PB&J Oatmeal or Peanut Butter and Apple Oatmeal. I then had the greatest idea, why not combine the two? The result? A delicious breakfast!

Ingredients:

Ingredients:
- 1/4 cup GF rolled oats
- 3/4 cup almond milk
- sea salt
- 1 tbsp peanut butter (I used Peanut Butter & Co. Mighty Maple)
- 1 tbsp peanut flour
- 1/2 tbsp jam
- 1/2 small apple, chopped
Directions:
- In a microwave safe bowl, combine oats, almond milk, and a dash of sea salt and stir to combine.
- Place in fridge overnight. (Heat in the microwave for 1 minute first if you want even softer oats.)
- The next morning, reheat oatmeal for 1 minute. Stir in peanut butter, peanut flour, and jam.
- Top with chopped apple!
If you don't have peanut flour, you can add an extra tablespoon of peanut butter. I used the peanut flour for extra peanut taste (this stuff gives a strong peanut flavor that I love) and for the extra protein. You can get peanut flour at iherb and first time users can use my code LWZ362 for a discount.
This recipe yields approximately 315 calories and 11g protein.
Sunday, February 17, 2013
Sweet Potato Black Bean Chili
Sweet potatoes are one of my favorite foods. They are great baked as fries, in a savory mexican style dish, or even as a sweeter dish topped with almond butter. You can also use sweet potato as a replacement for anything that calls for pumpkin.


Today I am sharing a delicious savory meal I made on a Sunday. I made it in the crockpot so it was quick and easy and I had a perfect nutrition meal ready for me when I got home from a busy day!

This recipe was adapted from here:
Ingredients:
- 2 15oz can black beans, drained and rinsed
- 1 lb sweet potatoes, cut into bite sized pieces
- 1 6oz can tomato paste
- 4 cups vegetable broth
- 3 tsp minced garlic
- 1 tbsp chili powder
- 1.5 tsp cinnamon
- 1 cup dry quinoa
- salt and pepper, to taste
Directions:
- Combine all ingredients except quinoa in a crockpot.
- Cook over high for 4 hours.
- Add quinoa. Turn temperature to low and cook for an additional hour or until quinoa absorbs all the liquid.
- Adjust seasonings to desired taste.

The original recipe actually calls for cumin, and not the cinnamon. But I love cinnamon and think sweet potato and cinnamon go really well together. It definitely did in this chili! Try out my recipe, the original recipe, or play around with your own spices to get the flavors that taste best to you!

I am roughly estimating that this recipe makes 8 servings. Based on one serving, this recipe yields approximately 262 calories and 11g protein.
Thursday, February 14, 2013
Fudgy Red Velvet Brownies
Even though Valentine's Day is practically over, here is a dessert that is perfect for this holiday. Red Velvet seems to be very popular around this time of the year. Unfortunately, many recipes that are named Red Velvet (brownies, cookies, cake, etc.) are usually filled with red dye food coloring. Food coloring can come with a lot of health risks including cancer, birth defects, allergic reactions, hyperactivity, and other behavioral problems. Check out this website for more information. Food coloring is definitely fun to use to turn food vivid fun colors, but it is not worth these health risks. I would much rather color my food naturally.
Today I am posting a recipe for Red Velvet Brownies. This recipe uses beets to naturally color the brownies red. However, my brownies still came out looking like regular chocolate brownies, which I think is either because I used canned beets or it might be because of the amount of cocoa powder used in this recipe. Some people might prefer there brownies to look regular and others might miss that red velvet color. I recommend trying to use fresh cooked beets to get that red color. If that doesn't work, I'm sure you could try reducing the amount of cocoa powder or maybe leaving it out completely, but then your brownies won't taste chocolatey.

This recipe was adapted from here:
Ingredients:
- 1 cup red kidney beans
- 1/2 cup cooked beets
- 1/2 cup cocoa powder
- 1 tsp vanilla extract
- 1/2 tsp almond extract
- 3/4 tsp baking powder
- 1/8 tsp baking soda
- 4 tbsp applesauce
- 1/8 tsp salt
- 3/4 cup raw sugar
- 1/2 cup ground flax
Directions:
- Preheat oven to 350F and spray an 8x8" pan with cooking spray. Set aside.
- In a food processor, puree kidney beans and beets. Transfer to a large bowl.
- Add the remaining ingredients and stir until smooth and well combined.
- Spread batter evenly into prepared pan.
- Bake for 40 minutes. The brownies are done when a toothpick comes out slightly clean.

These brownies are fudgy! If you don't like fudgy brownies I guess you can try cooking them a little longer, but I cannot vouch for these results. I like fudgy brownies so I found these to be perfect!
I love that these brownies are tasty and you are getting some healthy nutrients. Beans and vegetables in a dessert! And you cannot even taste it! I'll take that kind of dessert any day.
Based on 9 servings, each brownie yields approximately 128 calories and 4g protein.
Monday, February 11, 2013
Spirulina Avocado Sauce
I have been absolutely loving avocado! I love the green color, I love the creaminess, I love the healthy fats, I love that it can be made in sweet and savory meals.
Today I have a recipe for a savory meal. I had a 1/2 an avocado left and knew I wanted to use it as a sauce for pasta. This morning I came across this recipe and it was perfect timing. The recipe was a dressing that used avocado. However, the recipe was for a salad dressing, but I was curious if I could turn it into a pasta sauce. With a few changes to the original recipe, I think this sauce came out tasting fantastic and so good that I will definitely be making it again.
The only thing to know about this recipe is that it calls for Spirulina. In case your not sure what spirulina is here's a great resource of information. Basically the website says that sprirulina is an algae that has been used since the 1970's as a dietary supplement. It contains vegetable proteins, all 22 essential amino acids, multi-vitamins, and minerals. There are tons of health benefits that come with taking spirulina, which include:
Spirulina comes in powder form or tablet form. I like the powder form because I usually add it to smoothies. I love adding it to smoothies in the morning, because it really does give you a great burst of energy!
So getting back to the recipe, using spirulina may bring up two issues with this recipe:

Today I have a recipe for a savory meal. I had a 1/2 an avocado left and knew I wanted to use it as a sauce for pasta. This morning I came across this recipe and it was perfect timing. The recipe was a dressing that used avocado. However, the recipe was for a salad dressing, but I was curious if I could turn it into a pasta sauce. With a few changes to the original recipe, I think this sauce came out tasting fantastic and so good that I will definitely be making it again.
The only thing to know about this recipe is that it calls for Spirulina. In case your not sure what spirulina is here's a great resource of information. Basically the website says that sprirulina is an algae that has been used since the 1970's as a dietary supplement. It contains vegetable proteins, all 22 essential amino acids, multi-vitamins, and minerals. There are tons of health benefits that come with taking spirulina, which include:
- Boosts the immune system
- Improves digestion
- Reduces fatigue
- Builds endurance
- Cleanses the body
- Boosts energy levels
- Controls appetite
- Helps maintain a healthy cardiovascular function
- Supports the liver and kidneys
- Reduces inflammation
- Benefits people who suffer from allergies
Spirulina comes in powder form or tablet form. I like the powder form because I usually add it to smoothies. I love adding it to smoothies in the morning, because it really does give you a great burst of energy!
So getting back to the recipe, using spirulina may bring up two issues with this recipe:
- Spirulina is not a common household ingredient and it is expensive. If you do not have spirulina and do not want to spend the money on it, you can leave it out of the recipe, but your sauce will not be as green or filled with as many nutrients. However, if you want extra green color and some added nutrients, I'm sure you could add about 1/2-1 cup of spinach or kale. If you are interested in trying spirulina, I order it online from iherb. If you want to order some, or any other bulk ingredients, if you enter the code LWZ362 at checkout you can receive $10 off your first order if you spend more than $40 or you can receive $5 off your first order if you spend less than $40.
- Spirulina is packed with nutrients and is best consumed in raw form, which means it is best in cold things like smoothies. This means that if you like a hot pasta, this meal may not be best for you. Trust me, you don't want to heat spirulina, it turns brown and doesn't even taste good after being heated. If you want though, you can try to heat your pasta so the pasta itself is extremely hot, then stir in the cold sauce and you'll end up with a warm/cool pasta. If you love hot pasta, but are willing to try warm/cool instead of completely cold, this may be a good option for you.
So now that you have some options about using spirulina (or not) here is how I made my Spirulina Avocado Sauce which has been adapted from Choosing Raw.
Ingredients:
- 1/2 avocado
- 1/2 tsp spirulina
- 1/2 zucchini
- 2 tbsp hemp seeds
- 1/4 cup almond milk
- 1 1/2 tbsp lemon juice (or to taste)
- 1/2 tsp salt (or to taste)
Directions: Combine all ingredients in a blender and blend until smooth and creamy.
Once your sauce is made you can add it to pasta, brown rice, spaghetti squash, etc and then add any other toppings you want. I added chickpeas to my pasta dish! I was in the mood for a really saucy dish so the noodles are basically hidden under the sauce. I used the entire recipe for my noodles, but the sauce really serves 2-3 people.

This picture does not do the bright, green color of the sauce any justice.
It was a brilliant green color in person.
Based on using a small avocado, medium zucchini, and original Silk PureAlmond milk this entire recipe yields approximately 261 calories and 10g protein.
Sunday, February 10, 2013
Banana Yogurt Oatmeal
I made the best oatmeal this morning. It was so creamy and tasted like cheesecake! I even almost called this Banana Cheesecake Oatmeal, but went with Banana Yogurt Oatmeal instead since it isn't really cheesecake and thought yogurt was more true to the name of the oatmeal.
As I decided on what to add to my oats this morning I knew I wanted something creamy. I love creamy oatmeal and knew that yogurt would be the perfect ingredient. I also love adding a fruit, and usually that fruit is a very ripe mashed banana for the natural sweetness and additional creaminess the mashed banana gives to the oats. Finally, I wanted some vanilla flavoring as well and thought what better way to add vanilla and protein to my oats so I added some of my favorite protein powder, Sunwarrior Blend Raw Vanilla Protein Powder.

Ingredients:
- 1/4 cup GF rolled oats
- 1/2 cup almond milk
- dash of sea salt
- 1/4 cup yogurt (I used Wholesoy Plain)
- 1 small banana, mashed
- 1/2 scoop vanilla protein powder (I used Sunwarrior Blend Raw Vanilla Protein Powder)
- dash of cinnamon (if desired)
Directions:
- Combine oats, almond milk, and sea salt in a bowl overnight.
- The next morning, reheat for 1 minute.
- Stir in yogurt, banana (I left about 1/4 unmashed and added the slices as a topping), and protein powder. Stir until combined. Top with banana slices and cinnamon, if desired.
I'm sure this would also taste amazing with peanut butter drizzled on top. I actually debated adding some to my bowl this morning, but I'm glad I didn't because I don't think the banana flavor would have been as intense. I will most likely try this with peanut butter another day this week though because I love the combination of banana and peanut butter together.
Based on using Bob's Red Mill Gluten Free Rolled Oats, original Silk PureAlmond milk, Wholesoy Plain yogurt, and Sunwarrior Blend Raw Vanilla Protein Powder, this recipe yields approximately 315 calories and 15.5g protein.
Saturday, February 9, 2013
Tofu Jambalaya
Here is a great, tasty meal for when you want something spicy and full of nutrients. This jambalaya is packed with veggies, healthy carbs from the brown rice, and the tofu packs tons of protein! It is also a very easy and quick meal to make and leftovers are just as delicious the next day!

This recipe was adapted from FatFree Vegan Kitchen:
Ingredients:


This recipe was adapted from FatFree Vegan Kitchen:
Ingredients:
- 1 lb extra-firm tofu, frozen and defrosted
- 1 large onion, chopped
- 1 bell pepper, chopped (green and/or red)
- 2 ribs celery, chopped
- 3 cloves garlic, chopped
- 1 cup uncooked brown rice
- 1 28oz can diced tomatoes
- 1 cup water
- 2 1/2 tsp chili powder
- 1 tsp salt
- 1 tsp thyme
- 1/2 tsp Liquid Smoke
- cayenne and black pepper, to taste
Directions:
- Cut the tofu into 1/2 inch cubes. Set aside.
- In a large pot, saute onion, bell pepper, and celery over medium-high heat until soft.
- Add rice and garlic and cook for about 2 minutes while stirring.
- Add tomatoes, water, and all seasonings and stir to combine.
- Gently stir in tofu.
- Cover the pot tightly and turn heat to low. Cook for about an hour or until rice is done and the liquid is absorbed.

The original recipe recommends using white rice because it cooks faster. I prefer brown rice, though, and I can wait an extra 30 minutes while it only simmers; it is not like I had to do any extra steps for the brown rice. But I guess if you are in a rush, you should use the white rice and you will only need 1/2 cup of water instead of 1 cup.
Also, if you want to make this more like regular jambalaya that is more "meatier" than tofu, you can probably use vegan sausage in place of or in addition to the tofu.
Besides chopping all the vegetables, this meal came together very quickly. And here's a tip, to quickly chop all the vegetables, I added them all to a food processor and pulsed a few times. Then, once everything is mixed together in the pot, there is really nothing more to it!
I am roughly estimating that this recipe makes about 8 servings and each serving yields approximately 175 calories and 8.5g protein.
Saturday, February 2, 2013
Gingerbread Oat Muffins
Last night I was in the mood for a yogurt bowl as an evening snack and I love adding fruits and muffins to my yogurt bowl. I dug into my freezer and found that I had these Gingerbread Oat Muffins saved from when I made them over the holidays. That is what I love about muffins, you can freeze them and they stay so fresh. I just let it thaw out and reheated it in the microwave for a few seconds and it tasted just as fresh as before.

This recipe was adapted from here:
Ingredients:
With this recipe, I was able to make about 9 muffins. If you want to store these, or any type of muffin, what I do to keep them the freshest is wrap them individually in saran wrap. Then, I place them all into a gallon sized ziploc bag and store them in the freezer. When I want one, I take one out of the freezer and let it sit on the counter until it is thawed. However, if you want to eat it immediately, reheat it in the microwave, oven, or a toaster oven will probably work really well.
What I love the most about this recipe is that all the sweetness comes naturally from the spices and the banana (just make sure to use a ripe banana). Since there is no added sugar, these muffins can be enjoyed at any time of the day guilt-free and maybe even more than one muffin at a time! :-P

Based on making 9 muffins using Bob's Red Mill Gluten Free Rolled Oats and original Silk PureAlmond milk, this recipe yields approximately 111 calories and 2.5g protein.

This recipe was adapted from here:
Ingredients:
- 1 cup GF oat flour
- 1/2 cup GF instant oats
- 1 tsp baking powder
- 1/2 tsp baking soda
- 1/2 tsp cinnamon
- 1/2 tsp ginger
- 1/2 tsp cloves
- 1/4 tsp allspice
- 1/8 tsp nutmeg
- 1/8 tsp salt
- 1/2 cup almond milk
- 1 mashed large banana
- 1/4 cup molasses (mild, not blackstrap)
Directions:
- Preheat oven to 350F and spray a muffin tin with non-stick spray or line the muffin tin with cupcake liners.
- In a large, combine the dry ingredients.
- In a separate bowl, mix together the almond milk, banana, and molasses.
- Combine the dry ingredients with the wet ingredients and stir well.
- Fill the muffin tins so they are about 2/3 full.
- Bake for 13-15 minutes. Allow to cool for a couple of minutes before removing from the pan.
With this recipe, I was able to make about 9 muffins. If you want to store these, or any type of muffin, what I do to keep them the freshest is wrap them individually in saran wrap. Then, I place them all into a gallon sized ziploc bag and store them in the freezer. When I want one, I take one out of the freezer and let it sit on the counter until it is thawed. However, if you want to eat it immediately, reheat it in the microwave, oven, or a toaster oven will probably work really well.
What I love the most about this recipe is that all the sweetness comes naturally from the spices and the banana (just make sure to use a ripe banana). Since there is no added sugar, these muffins can be enjoyed at any time of the day guilt-free and maybe even more than one muffin at a time! :-P

Based on making 9 muffins using Bob's Red Mill Gluten Free Rolled Oats and original Silk PureAlmond milk, this recipe yields approximately 111 calories and 2.5g protein.
Monday, January 28, 2013
4 Bean Chili
I woke up this morning to a 2 hour delay for school/work due to freezing rain! I think that means this is a perfect morning to post a recipe for this delicious, warm chili I made last week. This chili is full of protein, vegetables, and taste. The seasonings in this chili were amazing! This chili is also another easy meal. Just toss everything into a crockpot (which requires very little chopping) and let it work its magic.

This recipe was adapted from Daily Garnish:
Ingredients:

Since my mom is not a fan of really spicy food, I kept the spice level down. However, feel free to add more spice if you like a spicier meal. I thought the cinnamon helped give this chili the perfect sweet & spicy flavor though.
Also, feel free to switch up the kinds of beans you use. You can use chickpeas, lentils, cannellini, adzuki, etc. Or if you want a "meatier" chili, try adding about 1/2-1 cup dried TVP to the crockpot, but you will probably need to add at least another 1/2-1 cup of liquid. (I haven't tried adding TVP yet so I can't vouch for the results of the chili with this version.)
This was so easy and tasty and made plenty so that I had leftovers for lunch the next day! I cannot wait to make this delicious meal again!

I am roughly estimating that this chili makes 8 hearty bowls.
One serving yields approximately 213 calories and 12g protein.

This recipe was adapted from Daily Garnish:
Ingredients:
- 1 medium onion, chopped
- 1 10oz bag of frozen mixed bell pepper strips, chopped
- 1 15oz can black beans
- 1 15oz can red kidney beans
- 1 15oz can great northern beans
- 1 15oz can white kidney beans
- 2 15oz can fire roasted tomatoes
- 2 cups vegetable broth
- 2 tablespoons chili powder
- 2 teaspoons garlic powder
- 1.5 teaspoons ground cinnamon
- sea salt, to taste
Directions:
- Combine all ingredients in a crockpot.
- Cook on high for about 4 hours or low for about 8 hours or until ready to serve.

Since my mom is not a fan of really spicy food, I kept the spice level down. However, feel free to add more spice if you like a spicier meal. I thought the cinnamon helped give this chili the perfect sweet & spicy flavor though.
Also, feel free to switch up the kinds of beans you use. You can use chickpeas, lentils, cannellini, adzuki, etc. Or if you want a "meatier" chili, try adding about 1/2-1 cup dried TVP to the crockpot, but you will probably need to add at least another 1/2-1 cup of liquid. (I haven't tried adding TVP yet so I can't vouch for the results of the chili with this version.)
This was so easy and tasty and made plenty so that I had leftovers for lunch the next day! I cannot wait to make this delicious meal again!

I am roughly estimating that this chili makes 8 hearty bowls.
One serving yields approximately 213 calories and 12g protein.
Monday, January 21, 2013
Cookie Dough Dip
Back when I used to eat dairy products and eggs, I was definitely guilty of eating cookie dough straight from the container. The risk of salmonella? Totally worth it in my eyes (I was young haha). And when I got older and knew it was not a risk worth taking, well just a tiny bit of dough wouldn't hurt, right? Like maybe just a spoonful? Or two? Okay, maybe three, but that is definitely all.
Well, now that I no longer eat animal products, I do not have to worry about the risk of salmonella at all. And the best part is I can still enjoy cookie dough! While this recipe doesn't taste exactly like cookie dough, it definitely resembles it and is much healthier than regular cookie dough.

This recipe was adapted from Chocolate Covered Katie:
Ingredients:

I recommend using more coconut sugar if you want a sweeter cookie dough and maybe even increase the vanilla extract to 2 tsp. You can also use brown sugar in place of the coconut sugar.
This cookie dough is great for dipping fruits. It can also be used to spread on graham crackers, toast, or eaten right off the spoon! Keep this cookie dough stored in an airtight container in the fridge.
This recipe makes about 1.5 cups of Cookie Dough.
Based on using Goya Chickpeas, Peanut Butter & Co. Mighty Maple Peanut Butter, Coconut Sugar, original PureAlmond milk, and Enjoy Life mini chocolate chips: 2 tbsp yields approximately 90 calories and 4g protein.
Well, now that I no longer eat animal products, I do not have to worry about the risk of salmonella at all. And the best part is I can still enjoy cookie dough! While this recipe doesn't taste exactly like cookie dough, it definitely resembles it and is much healthier than regular cookie dough.

This recipe was adapted from Chocolate Covered Katie:
Ingredients:
- 1 can chickpeas (drained and rinsed)
- 1/8 tsp baking soda
- pinch of salt
- 1 tsp vanilla extract
- 1/4 cup nut butter (I used Peanut Butter & Co. Mighty Maple)
- 3 tbsp coconut sugar (or more to taste)
- 2 tbsp almond milk (or more)
- 1/4 cup vegan chocolate chips (or more)
Directions:
- In a food processor, combine all ingredients except almond milk and chocolate chips and blend until smooth.
- Taste and adjust sugar to desired sweetness.
- Add 2 tbsp almond milk and reblend until smooth. Add more almond milk, if needed, to reach desired consistency. (I found 2 tbsp to be the perfect amount.)
- With a spoon, stir in chocolate chips.

I recommend using more coconut sugar if you want a sweeter cookie dough and maybe even increase the vanilla extract to 2 tsp. You can also use brown sugar in place of the coconut sugar.
This cookie dough is great for dipping fruits. It can also be used to spread on graham crackers, toast, or eaten right off the spoon! Keep this cookie dough stored in an airtight container in the fridge.

This recipe makes about 1.5 cups of Cookie Dough.
Based on using Goya Chickpeas, Peanut Butter & Co. Mighty Maple Peanut Butter, Coconut Sugar, original PureAlmond milk, and Enjoy Life mini chocolate chips: 2 tbsp yields approximately 90 calories and 4g protein.
Sunday, January 20, 2013
Banana Berry Yogurt Smoothie
I have been trying to drink more smoothies lately to increase my nutrition: protein, calories, nutrients, fruits, veggies, etc. This smoothie, however, does not contain any veggies. I usually love green smoothies but I was really in the mood for something sweet. I enjoyed this as a morning snack which is interesting since I have noticed I have a much bigger sweet tooth in the morning and more savory cravings in the evenings.

Banana Berry Yogurt Smoothie:
Ingredients:


Banana Berry Yogurt Smoothie:
Ingredients:
- 1 cup almond milk
- 1/2 frozen banana
- 1/2 cup non-dairy yogurt (I used Silk Live Plain Soy Yogurt*)
- 1 cup frozen berries (I used mixed berries)
- 1 tbsp ground flax seeds
Directions: In a blender combine all ingredients and process until smooth and creamy.
This smoothie makes 1 large serving!
*I was going to provide a link to the soy yogurt I used, but I think they stopped making this product. In fact, I haven't seen it in being sold in the stores lately. They do have a new line of Fruity & Creamy yogurt which is still soy based but I only see fruit flavored ones and no plain yogurt. I actually tried the Strawberry flavor and it was okay, but kind of sweet. I like the plain ones better so I can control the sweetness and mix in flavors that I want.
I'm sure one of these fruity yogurts could be swapped in place of the plain yogurt and the mixed berries though, but maybe add a whole frozen banana for more creaminess and volume.
If like me you are looking for a new non-dairy yogurt that comes in a 24oz container to make yogurt bowls and smoothies, or to control your own yogurt flavor and sweetness, I'm going to try out this Amande yogurt. It is almond based, not soy based which is fine by me since I prefer almond based yogurts. Unfortunately, it is lower in protein. I haven't tried it yet, but I'm sure you will be seeing more recipes with it in the future. I have tried their 6oz strawberry flavored yogurt and it was very thin, like the Silk Soy Yogurt and not as thick as my favorite almond yogurt by Almond Dream. I love thick yogurt but unfortunately Almond Dream yogurt is much more expensive and even lower in protein so I buy it to enjoy alone as a snack on occasions.

Based on using original PureAlmond Milk, Silk Live Plain Soy Yogurt, and Bob's Red Mill Ground Flaxseed Meal, this smoothie yields approximately 260 calories and 7g protein.
With Amande plain yogurt, this smoothie yields approximately 270 calories and 6g protein.
Saturday, January 19, 2013
Chocolate Peanut Butter Oatmeal
I was craving something sweet for breakfast on Monday morning. I guess since it was the beginning of the week, I wanted something comforting. This oatmeal hit the spot. I cannot wait to make it again!

This recipe was inspired from here:
Ingredients:
Directions:

Even though I used chocolate peanut butter, adding the extra cocoa powder took this breakfast beyond amazing. The peanuts added a nice crunch and helped make the peanut taste stand out. The banana added sweetness, creaminess, and increased the flavor. Chocolate peanut butter and banana = amazing!
Based on using Bob's Red Mill Gluten Free Rolled Oats and Silk Original PureAlmond Milk, this recipe yields approximately 310 calories and 10.5g protein.

This recipe was inspired from here:
Ingredients:
- 1/4 cup GF Rolled Oats
- 1/2 cup almond milk
- Sea Salt
- 1 Tbsp cocoa powder
- 1/2 small banana, mashed
- 1 Tbsp PB & Co. Dark Chocolate Dreams Peanut Butter
- 1 Tbsp crushed peanuts
Directions:
- In a microwave safe bowl, combine oats, almond milk, a dash of sea salt and heat in the microwave for 1 minute. Stir in cocoa powder and heat for another 1 minute watching closely to avoid spillage.
- Allow it to sit in the microwave or on the counter for about 10 minutes.
- Place in the fridge overnight to soften the oats and add volume.
- In the morning, reheat for about 1 minute.
- Stir in mashed banana and chocolate peanut butter.
- Top with crushed peanuts.

Even though I used chocolate peanut butter, adding the extra cocoa powder took this breakfast beyond amazing. The peanuts added a nice crunch and helped make the peanut taste stand out. The banana added sweetness, creaminess, and increased the flavor. Chocolate peanut butter and banana = amazing!
Based on using Bob's Red Mill Gluten Free Rolled Oats and Silk Original PureAlmond Milk, this recipe yields approximately 310 calories and 10.5g protein.
Monday, January 14, 2013
White Bean Kale Soup
With these colder months, I have been making a lot of soups, stews, and chilis. This recipe is one of my family's favorite soups.

Ingredients:
This soup tastes best the next day. However, the soup is so good it is hard to wait that long! I highly recommend doubling the recipe so you can eat some immediately and save the leftovers for another day.

This is such an easy soup to make. The hardest part is chopping the vegetables, but you can use a food processor to help chop vegetables or I have found that buying pre-chopped vegetables is a great alternative for when you are in a rush or don't mind spending a few extra bucks to save some time. We get these pre-chopped carrots, onions, and celery from Trader Joe's:

I am roughly estimating that this recipe makes six servings.
One serving is approximately 175 calories and 9.5g protein.

Ingredients:
- 1 tablespoon olive oil
- 1 medium yellow onion, chopped
- 4 medium carrots, sliced
- 3 small celery ribs, sliced
- 5 garlic gloves
- 4 tablespoons dried oregano
- 4 cups vegetable broth
- 2 15oz cans white beans
- 1 Tablespoon nutritional yeast
- 3 cups kale (or more)
- salt and pepper, to taste
Directions:
- Heat olive oil in a large pot over medium-high heat. Add the onion, carrots, celery, garlic and oregano and saute until the onion is translucent.
- Add the broth, beans, and nutritional yeast. Increase the heat to high and bring to a boil. Once it begins to boil, reduce the heat to low and simmer 20 minutes, or until the carrots are soft.
- Once the carrots are soft, blend with a stick blender to the desired consistency. (I leave some soup unblended to add texture.)
- Add kale and allow to simmer for about 4 more minutes.
- Season with salt and pepper, serve, and enjoy!
This soup tastes best the next day. However, the soup is so good it is hard to wait that long! I highly recommend doubling the recipe so you can eat some immediately and save the leftovers for another day.

This is such an easy soup to make. The hardest part is chopping the vegetables, but you can use a food processor to help chop vegetables or I have found that buying pre-chopped vegetables is a great alternative for when you are in a rush or don't mind spending a few extra bucks to save some time. We get these pre-chopped carrots, onions, and celery from Trader Joe's:

I am roughly estimating that this recipe makes six servings.
One serving is approximately 175 calories and 9.5g protein.
Sunday, January 13, 2013
Banana Walnut Cookies
If you have a dehydrator, this is a great recipe to make a simple, raw, and nutritious cookie!

This recipe was adapted from here. I quadrupled the recipe so I would have extras.
Ingredients:

If you don't have a dehydrator, I'm sure you can still make this cookie in the oven at a low temperature. I haven't tried these in the oven myself though, so I am not sure what temperature the oven should be set at or for how long.
You could also just make a single serving of this recipe and eat it straight out of the bowl for a tasty snack! Maybe even add in some peanut butter :)
Based on making 40 cookies, each cookie yields approximately 32 calories and <1g protein.

This recipe was adapted from here. I quadrupled the recipe so I would have extras.
Ingredients:
- 4 bananas
- 1/4 cup walnuts
- 1/4 cup raisins
- 1 tsp cinnamon, or to taste
- Mash bananas.
- Combine all ingredients in a bowl and mix together.
- Spoon into 40 cookies on a dehydrator sheet.
- Dehydrate at 115 for 8-10 hours.
After my cookies were finished in the dehydrator, I let them sit out on the counter for a day and the next day they were the perfect consistency. These are also great portable snacks to pack and take with you for work, school, traveling, etc.

It would be fun to try adding different ingredients in these cookies, like chocolate chips, peanut butter, or different nuts!
You could also just make a single serving of this recipe and eat it straight out of the bowl for a tasty snack! Maybe even add in some peanut butter :)
Based on making 40 cookies, each cookie yields approximately 32 calories and <1g protein.
Wednesday, January 9, 2013
Rainbow Quinoa Salad
I am like a little kid when it comes to colorful food. Thankfully, as an adult, I enjoy natural foods. So when it comes to turning my food green, blue, red, purple, etc. I do not use food coloring. I use natural healthy foods like spinach, avocado, beets, berries, etc. like in these recipes:
Blueberry Beet Overnight Oats - It looks purple in the picture, but in person it was a bright pink color!
Green Monster Overnight Oats
Mint Chocolate Chip Protein Pancakes
Green Breakfast Pudding
Beet Juice
Green Lemonade
Morning Start Green Juice
Grasshopper Pudding Parfait
I definitely want to try out more recipes to naturally turn my food fun colors!
Today I have a recipe that includes a rainbow of colors. I had heard of purple cauliflower but never tried it before. I love white cauliflower so I decided to give the purple cauliflower a try. To me, it tasted exactly like the white, so I enjoyed using this purple cauliflower to add even more color to my food. What better way to incorporate purple cauliflower than in a Rainbow Quinoa Salad!

This isn't really a recipe. The idea for this recipe was adapted from here:
Ingredients:

Purple cauliflower gets its color from the same pigments, called anthocyanins, as blueberries which help reduce the risk of cancer, diabetes, heart disease, and neurological problems. It also has high nutritional benefits, just like white cauliflower. Purple cauliflower is a great source of vitamin C, fiber, potassium, and B vitamins. (Source)

Blueberry Beet Overnight Oats - It looks purple in the picture, but in person it was a bright pink color!
Green Monster Overnight Oats
Mint Chocolate Chip Protein Pancakes
Green Breakfast Pudding
Beet Juice
Green Lemonade
Morning Start Green Juice
Grasshopper Pudding Parfait
I definitely want to try out more recipes to naturally turn my food fun colors!
Today I have a recipe that includes a rainbow of colors. I had heard of purple cauliflower but never tried it before. I love white cauliflower so I decided to give the purple cauliflower a try. To me, it tasted exactly like the white, so I enjoyed using this purple cauliflower to add even more color to my food. What better way to incorporate purple cauliflower than in a Rainbow Quinoa Salad!

This isn't really a recipe. The idea for this recipe was adapted from here:
Ingredients:
- red bell pepper
- orange carrots
- yellow corn
- green edamame
- purple cauliflower
- white quinoa
Directions:
- Cook quinoa according to directions on package.
- Once quinoa is cooked, mix together all ingredients.
- Season however you would like with any dressing or seasonsings. (I personally used Bragg's Liquid Aminos, a splash of lemon juice, Srirach, and some garlic powder.)

You can also use different colored vegetables instead of the ones listed, or in addition to the ones listed. Try broccoli, green beans, peas, red kidney beans, red lentils, yellow or green squash, yellow cauliflower, red quinoa, tri-colored quinoa, etc. The possibilities are endless!
Purple cauliflower gets its color from the same pigments, called anthocyanins, as blueberries which help reduce the risk of cancer, diabetes, heart disease, and neurological problems. It also has high nutritional benefits, just like white cauliflower. Purple cauliflower is a great source of vitamin C, fiber, potassium, and B vitamins. (Source)

Sunday, January 6, 2013
Banana Nut Oatmeal
This recipe has become one of my favorite oatmeal recipes in the morning. One can never go wrong with the combination of peanut butter and banana. Add in a few extra nuts and seeds and this recipe makes a filling and nutritious breakfast!

Ingredients:


Ingredients:
- 1/4 cup gf rolled oats
- 3/4 cup almond milk
- dash of sea salt
- 1 Tbsp peanut butter
- 1/2 banana, sliced
- 1/2 Tbsp walnuts
- 1/2 Tbsp pumpkin seeds
- dash of cinnamon
Directions:
- Combine oats, almond milk, and sea salt. Heat for 1 minute, stir, and let sit on the counter for 10 minutes. Cover and refrigerate overnight. (This helps make the oats soft. Alternatively you can refrigerate the oats without heating first for less soft oats, or you can omit this step completely).
- The next morning, reheat the oats 1-2 minutes in the microwave.
- Stir in peanut butter. (You can also stir in 1/2 a mashed banana if desired.)
- Add banana slices, walnuts, pumpkin seeds, and cinnamon.

I like to make the oats overnight and pre-measure the nuts and seeds. Then, in the morning, it is really easy to heat the oats, slice a banana while that is heating, and then stir everything into the oats.

Based on using Bob's Red Mill GF Rolled Oats, original Silk PureAlmond milk, and Peanut Butter & Co. Mighty Maple, this recipe yields approximately 333 calories and 9g protein.
If you add in the extra 1/2 banana that is mashed, the recipe yields approximately 388 calories and 9.5g protein.
Tuesday, January 1, 2013
Sweet Potato Tempeh
After all the cooking and baking I did on Christmas Eve and Christmas Day, I decided to keep New Year's Eve an easier night to prepare dinner. I made less food and nothing as spectacular or special.
For dinner we only had 2 dishes:
Sweet Potato Tempeh
Jerk Asparagus

Here's the recipe for the Sweet Potato Tempeh that was adapted from here:
Ingredients:

This meal was really good! I ate a large serving of this Sweet Potato Tempeh since it was the main part of my meal, but it is probably a better recipe for a side dish. However, to make it more of a meal, you could probably even add Kale to it and Quinoa or brown rice. I definitely should have done that and the next time I make this as a meal think I will try adding those ingredients.
For dessert I made Pineapple Spongecake from Everyday Happy Herbivore. I'm still perfecting the recipe since I have to make it gluten-free and haven't yet found the right flour, but it was tasty and if you own the book I definitely recommend giving it a try. If you don't own the book, I definitely recommend buying it because there are a ton of simple, delicious recipes. A new book has even been published, Happy Herbivore Abroad, which I just bought and cannot wait to try out some new recipes!
Based on making 6 side dish servings, 1 serving yields approximately 252 calories and 10g protein.
For dinner we only had 2 dishes:
Sweet Potato Tempeh
Jerk Asparagus

Here's the recipe for the Sweet Potato Tempeh that was adapted from here:
Ingredients:
- 1/4 cup tamari
- 1 tbsp mirin (sweet Japanese cooking wine) (Or any sweet wine could work, I used Marsala)
- 1/2 tsp garlic powder
- 1/2 tsp onion powder
- 1 tsp toasted sesame oil
- 1 8oz package tempeh, cut into bite-sized pieces
- about 2 pounds sweet potatoes, cut into bite-sized pieces
- 2 tsp EVOO
- 1/8 tsp ground ginger
- 1/8 tsp ground cinnamon
- 1/2-1 tbsp olive oil
- salt and pepper to taste
- 2 tbsp finely chopped parsley
Directions:
- Combine tamari, mirin, garlic powder, onion powder, and sesame oil into a wide, shallow container and stir to combine. Add tempeh, toss to coat, cover, and set aside to let marinate for at least 30 minutes. (I let mine sit overnight and almost all the marinade soaked into the tempeh).
- Toss sweet potatoes with olive oil, ginger, cinnamon, and 1 1/2 tbsp of the marinade from the tempeh. Set aside. (I just combined the rest of the marinade into the sweet potatoes.)
- Preheat oven to 350F.
- Heat 1/2-1 tbsp oil in a large skillet over medium heat. Drain any leftover marinade from the tempeh. Add the tempeh to the skillet and cook, turning frequently, about 5-7 minutes or until golden brown.
- Transfer to a 2-quart baking dish, toss with sweet potatoes, salt, and pepper. Cover with foil and bake until sweet potatoes are tender. (Mine took about an hour.)
- Garnish with parsley and serve.

This meal was really good! I ate a large serving of this Sweet Potato Tempeh since it was the main part of my meal, but it is probably a better recipe for a side dish. However, to make it more of a meal, you could probably even add Kale to it and Quinoa or brown rice. I definitely should have done that and the next time I make this as a meal think I will try adding those ingredients.
For dessert I made Pineapple Spongecake from Everyday Happy Herbivore. I'm still perfecting the recipe since I have to make it gluten-free and haven't yet found the right flour, but it was tasty and if you own the book I definitely recommend giving it a try. If you don't own the book, I definitely recommend buying it because there are a ton of simple, delicious recipes. A new book has even been published, Happy Herbivore Abroad, which I just bought and cannot wait to try out some new recipes!
Based on making 6 side dish servings, 1 serving yields approximately 252 calories and 10g protein.
Subscribe to:
Posts (Atom)